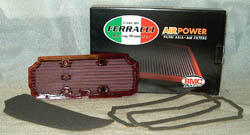
BMC Air filter installation into F4
A popular modification is the installation of a BMC air filter. In the USA our supplier is Fast by Ferracci.
www.ferracci.com
Part number for the F4 750 and 1000 is: F45800
Part number for the Brutale is: F45805
*NOTE that Europe has both a STANDARD and a RACE version available but in North America we seem to only have the RACE version.
The actual BMC filter part numbers are:
394/19 - for the street F4 filter
394/19 RACE - for the race F4 filter
360/19 - for the Brutale filter
Here is what FBF and BMC have to say about their filter:
"These high flow filters provide maximum protection, performance and quality. Developed in the high tech world of Formula 1 automobile racing. These filters clearly outperform more expensive paper and fabric type filters. BMC washable air filters are manufactured to higher tolerances than competing brands for maximum filtration area and flow rate. BMC incorporates parallel pleated cotton fabric and special filter oil to offer flow rates of up to 900 CFM."
PROCESS of INSTALLATION:
-Remove all bodywork
-Remove Tank
-Remove airbox
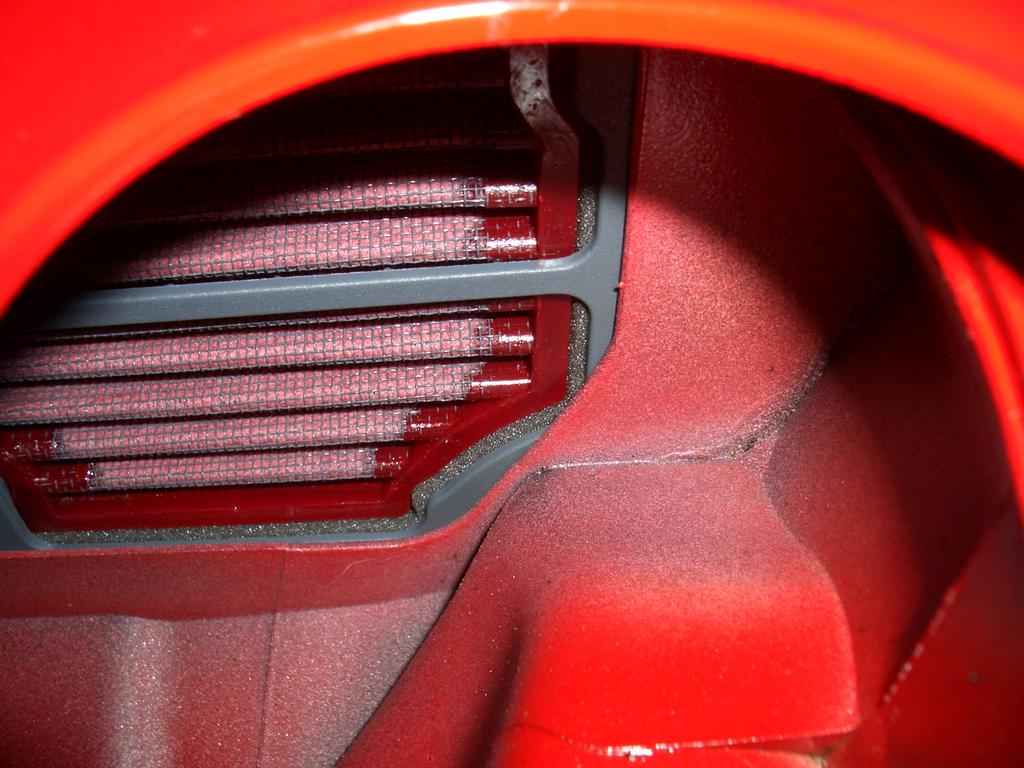
-Remove foil tape from air filter cage bottom
-Unclip the gray airfilter cage and remove OEM filter
*This is a good chance to clean out the inside of your airbox!
When your new BMC filter arrives it will have two packages. One including the foam weather stripping and another including the filter itself.
-Extract foam weatherstripping and filter from their packaging
-Place weatherstripping strips along the edge of each side of the air filter. Their contours follow that of the airfilter exactly
-Now you will need to modify the BMC air filter slightly so that it fits securely into the filter cage. Test fit the cage to see the exact outline that will need to be cut out. I used an X-acto knife, a razor blade will do.
Modify as follows
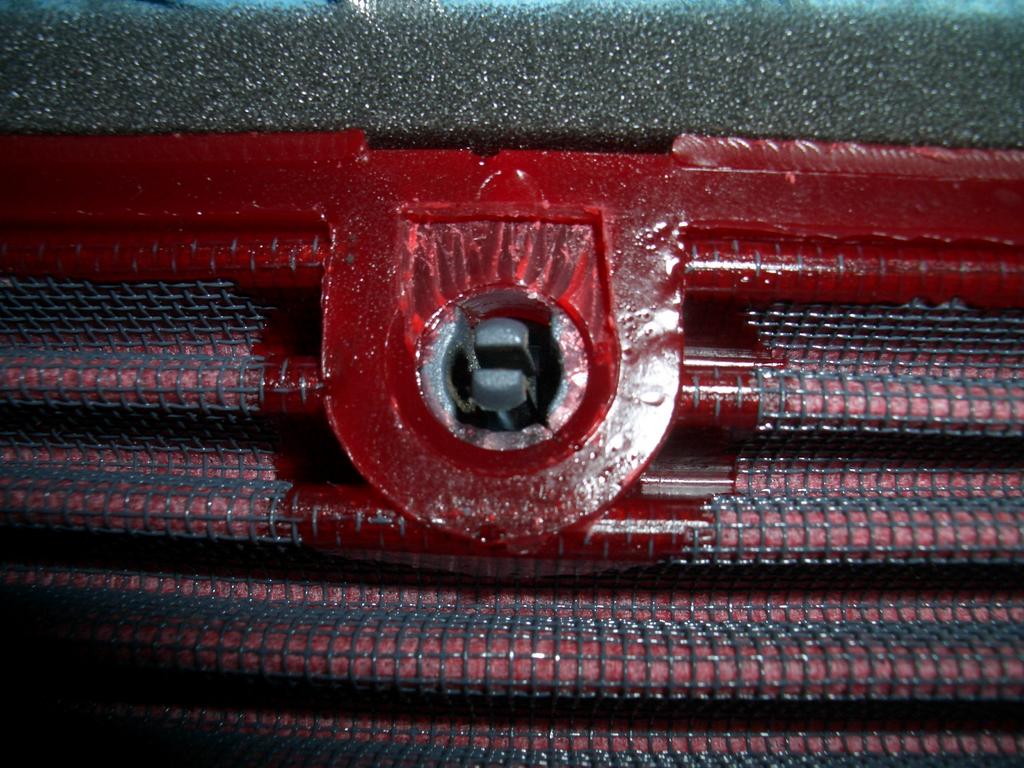
So that each component fits securely into the filter cage as shown. Only a few mm in thickness is removed. There are 4 holes to modify in total.
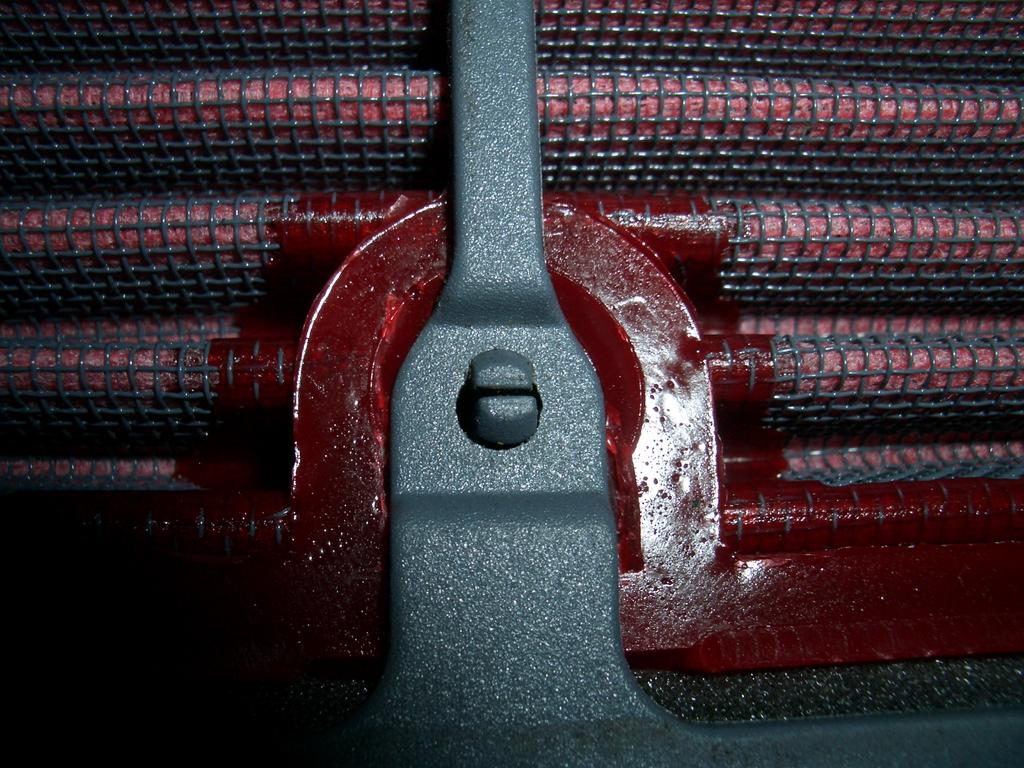
*Alternative method available. The Italian forum on Motociclando has been using a portion of toothpick to wedge between the barb and the hole to keep the cage assembled rather than making the time consuming cuts. I do not personally prefer this method for fear of toothpick bits being sucked into the engine.
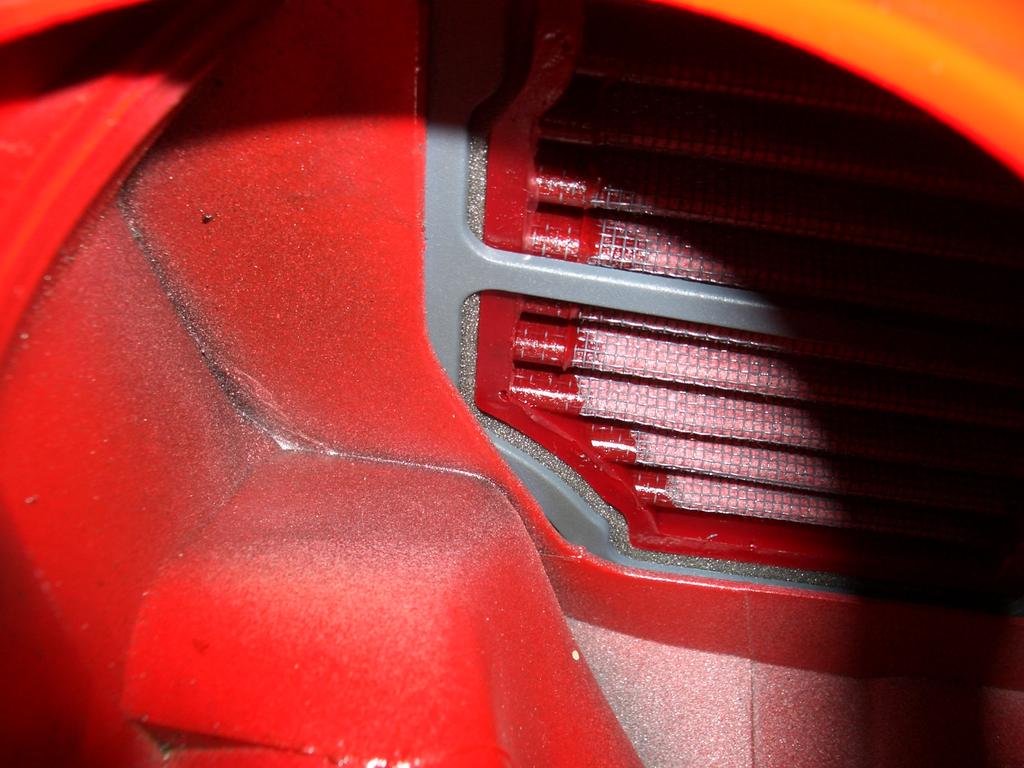
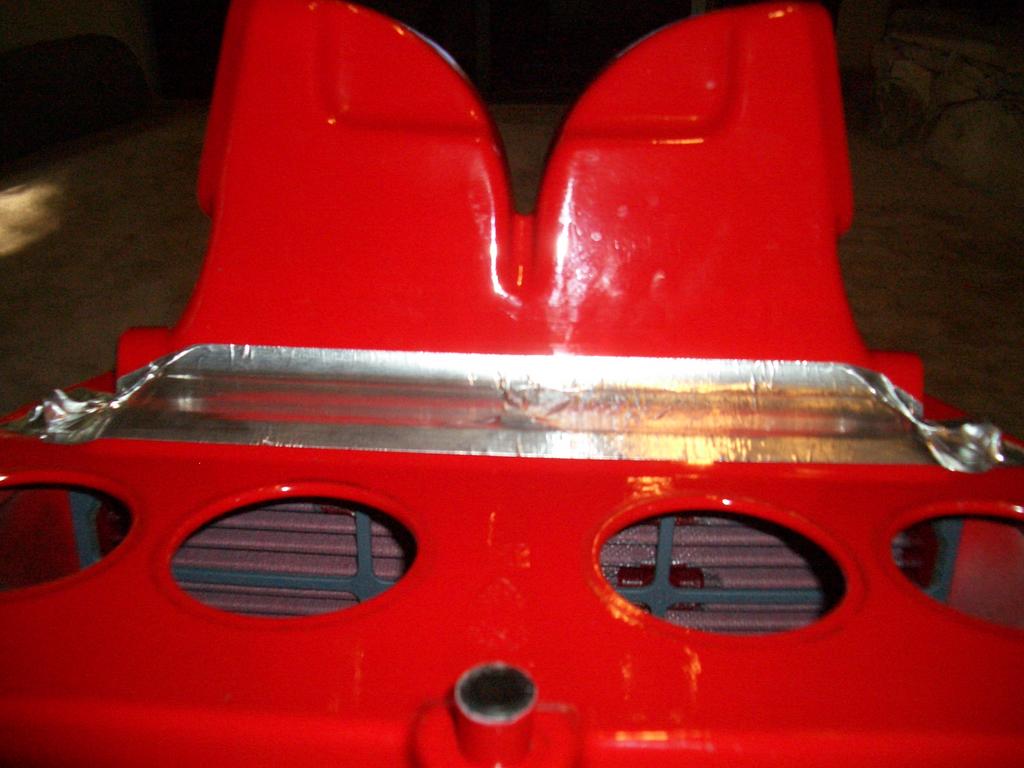
-Next slide the assembled and foam weather proofed filter into the cage. Note position of orientation notch for BMC filter relative to the cage for correct front/back orientation.
-Slide the filter cage into the clean airbox until you hear all securing tabs click. Note position of filter cage notch for correct front/back orientation.
-Verify secure installation of filter and cage into airbox.
-Cover the bottom of the filter cage with foil tape
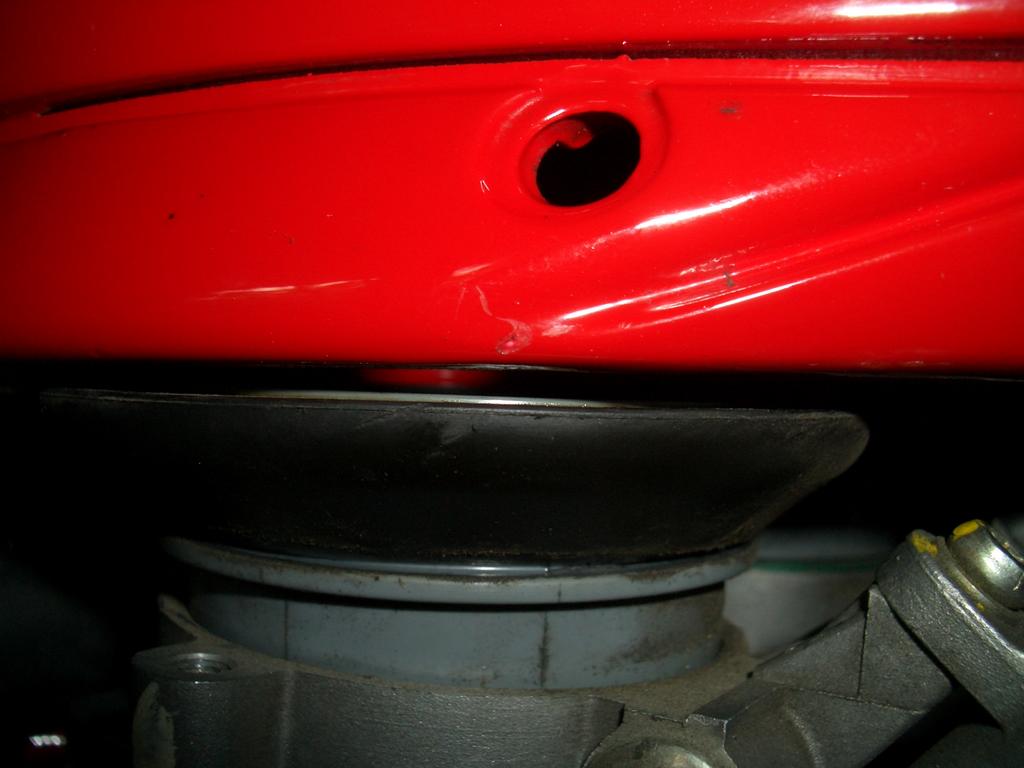
-Reinstall airbox taking care that the throttle body boots are secure against the bottom of the airbox openings. The factory suggests use of silicone grease between the rubber boots and the bottom of the airbox to ensure a good seal.
INCORRECT (note gap):
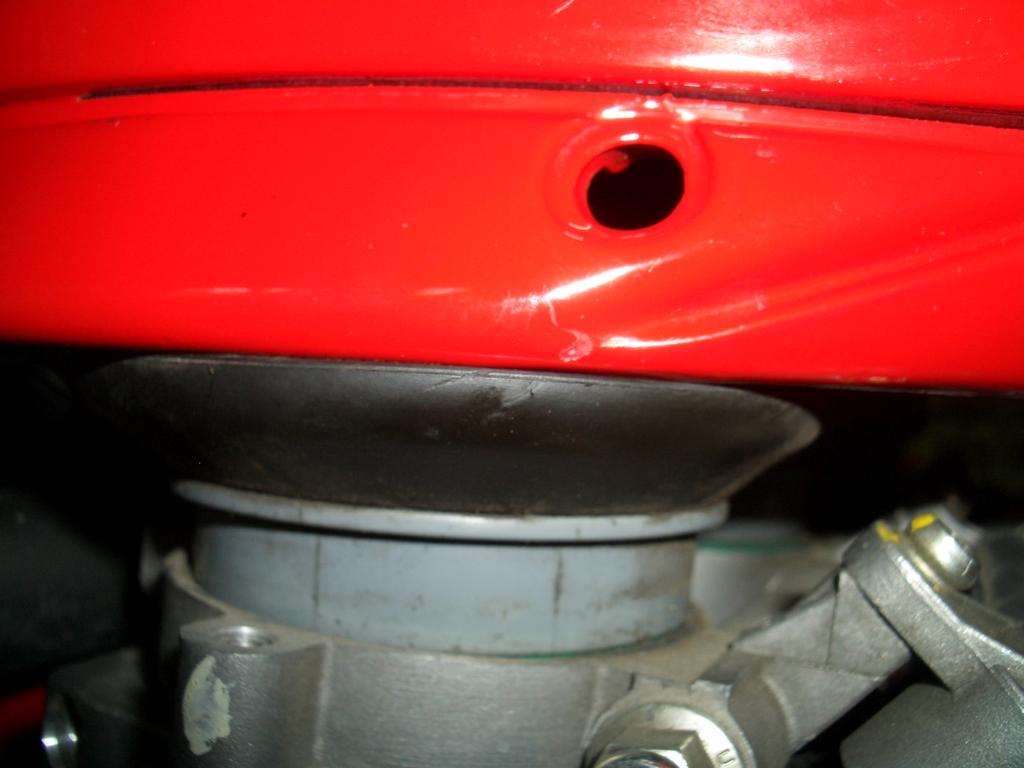
CORRECT (note lack of gap):
**Please note wellnut FAQ when re-installing airbox side covers. These should be replaced at each removal as they are ONE TIME USE.
-Reinstall Tank
-Reinstall bodywork
-Enjoy your new sound and increased breathing capacity!
JamesC
posted by MV FAQ @ 12:47 PM
2 Comments
![]()

2 Comments:
Very useful and informative article mate. many thanks for taking the time to post this.
John
Thank you so very much. I was at my wits end with installing this filter but your detailed explanation saved my day.
Bravo,
Ace
Post a Comment
Subscribe to Post Comments [Atom]
<< Home