Dzus fastener damage to fairing paint? Read on:
Submitted by Jerry Finley
I'm anal.. so sue me.. Comes from being the #1 motorcycle detailer in the south for 5 years in a row. I have had my 03 MV F4 for just a few months now and I already notice just a bit of scarring of the paint where the Dzus fasteners rub against it. It may get worse.. it may not, but rather than just bend over and take it.... here's one solution that's cheap and effective.. While Home Depot and Lowes are retailer's of this stuff, they usually do NOT carry the Clear version. I simply ordered mine direct at 800.327.8583 EST Behold my humble How-To...
Parts/Materials Needed:
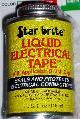
(1) Can Star Brite Liquid Electrical Tape from http://www.starbrite.com/ (about $6)
(1) pair pliers or vise grips
(1) block of styrofoam
(1) Imported beer
Step #1: Getting StartedI chose to do my fasteners a few at a time rather than remove all of them and the bodywork, but that was just a personal preference.First.. Remove whatever fasteners that you plan to coat from your bike. Make sure the ring of each fastener is clean.

Remember.. you are ONLY coating the end of the RING.. not the entire fastener. Duh. After you dip each Dzus in the liquid it will bead up and roll with the angle so you'll have to hang it upside down so the bead hangs perfectly down. This will guarantee that the majority of the hardened liquid is at the point where the fastener comes into contact with the bikes paint surface..
The consistency of the StarBrite liquid is, for the lack of a better analogy, thick as molasses. You don't want to get any more on the ring than is necessary. As the liquid does NOT come to the top of the can, you'll need to hold the fastener with a pair of pliers or vise grips. Do NOT leave the fastener in the "juice" for more than a second or two as you want as little on the ring as possible.

Step #2: Hang 'Em HighOnce you've dipped your Dzus (hmmm... sounds sexy....makes my nipples hard.. but I digress...) you'll need to hang them upside down for a full 24hrs as is recommended in the packaging. I chose a block of Styrofoam which worked like a charm.

Step #3: Reinstall...Hopefully, you did wait the required 24 hrs.. If you've done it correctly, you can't even see the coating on each ring. A few will have a slight accumulation, but hardly noticeable.
Reinstall, sit back and revel in your own magnificence. Your bike's paint will now stay as God/Yewah, Crom intended... You're done.. Beer/Bong time..
Visit Jerry's site including additional how-to's and parts for sale at: http://piratesk12site.net/MVIntro.htm
-edited JamesC
posted by MV FAQ @ 1:44 PM
0 Comments
![]()

0 Comments:
Post a Comment
Subscribe to Post Comments [Atom]
<< Home