Tuesday, September 13, 2005

Parts and Modifications, MV Agusta Corse & Aftermarket Suppliers

Submitted by Chris Current (Quixotic_1)

MV Agusta Special Parts MV Agusta Corse:

http://www.mvagusta-sp.com/

  • This site lists most MV Corse Special Parts items that are manufactured by or for MV Agusta
  • Factory parts offerings orderable by any dealer
  • Parts may also be purchased through this site and shipped worldwide
  • Located in San Marino, Italy
  • Ti factory parts manufactured by MotoCorse, see listing below

MV Agusta Aftermarket Suppliers:

Moto Corse Special Parts: http://www.motocorse.jp/

  • Top level Titanium parts as supplied directly and also to the factory for all MV Corse Ti
  • Top level tuning and engine internals
  • Creators of a number of special complete bikes for F4 and Brutale models
  • New line of Carbon Fibre parts
  • Suppliers of select top level components from other compaines which fit MV models

UK Contact: www.emotouk.com

US Contact: www.motopoint.com

Moto MV: http://www.moto-mv.com/index.htm

  • A mix of both MV Corse Special Parts and aftermarket parts
  • A wide variety of performance and aesthetic parts for all MV models
  • Includes racing parts, titanium bolts, aftermarket exhaust parts, Power Commanders, even MV clothing
  • Located in the UK

Performance Parts: http://www.performanceparts.de/

  • Site is in German, try Babelfish (http://babelfish.altavista.com/) to translate
  • Offers many performance parts, including: clip-ons, brake upgrades, suspension and steering tools and upgrades, lighter bolts, sprockets, MV tools and the often referenced gold brake reservoir connectors
  • Parts on offer are race proven by German Superbike effort of Jorg Teuchert
  • Located in Cologne, Germany but ships Intl

Be Faster: http://www.befaster.de/

  • Mostly German importer of Moto Corse MV parts
  • Also, though, they have many race accessories such as lap timers and very useful diagnostic equipment
  • Based in Hannover, Germany

Red Racing Parts: http://www.redracingparts.com/en/english.htm

  • Search for "MV Agusta" and a Google site search will display available parts
  • Everything from rearsets to chains to sprockets to stands to (limited) carbon fiber are offered here; too much to list
  • Located in Italy

MotoWheels: http://www.motowheels.com/

  • Many parts for MV Agusta including; carbon, titanium, radial caliper conversion, calipers, rotors, master cylinders, exhaust, wheels and misc.
  • Exhibit project MV F4 of their own including full carbon and BST wheels

Fast by Ferracci: http://ferracci.lhhosting.com/index.php

  • Not the easiest site to navigate, but their parts are renowned; everyone that rides Italian knows this company
  • The important 800cc overbore kit for the Agusta 750 (F4, Brutale)
  • The well-known quick-change carrier for 750 Agustas and accompanying sprockets
  • Exhausts, carbon fiber body parts, stands, clip-ons; too many to list...
  • Located in Willow Grove, Pennsylvania with a location in Bologna, Italy

Casoli Moto Australia: http://www.casoli.com.au/ recommended by forum members

  • Many parts for MV Agusta F4 and Brutale
  • Mostly known for their carbon fiber parts for the F4
  • They also sell several billet accessories, such as bar end weights, clutch and brake reservoirs, rearsets, fuel caps, etc. Their selection is constantly expanding
    Exhausts, windscreens, and even tools

Casoli Moto USA: http://www.casolimotousa.com/ OUT OF BUSINESS!

Casoli Moto UK) http://www.casoli.co.uk/ Many complaints about them!

Lieb Speed: http://www.lieb-speed.de/index.htm?frame=sg_NewsMVAgusta.htm

  • MV Agusta carbon bits for F4 and Brutale, VERY high quality prepreg carbon
  • Sponsor of Jorg Teuchert (races MV Agusta F4)
  • Located in Germany (and most of site is in German)
  • Distributed in USA by www.shift-tech.com - see below

Pirates' Lair: http://piratesk12site.net/MVPP.htm

  • Good site and well-regarded
  • They offer several hard-to-find parts
  • Exhaust headers for the Brutale, the mid-pipe replacement for the F4-1000, Wilbers Suspension, license plate relocator for the F4, billet reservoir covers, headlight protectors, R&G line of crash protectors (sliders), custom footpeg kits, two all-in-one tailights (clear with red LEDs that also functions as turnsignals and the Hyper Lite MV Kit), an exclusive front stand, and the F4 helmet lock put together exclusively for Pirate's Lair
  • Located in Fairview, North Carolina USA

PFM Brakes: http://www.pfmbrakes.com/welcome.asp?page=catalogue&logoid=7

  • UK Manufacturer of top level brake kits
  • Located in Isle of Man, UK

QB Carbon: http://www.worldofqbcarbon.com/products/mvagusta/mvagusta.htm

  • UK supplier of their own carbon parts for the F4 (highly regarded)
  • Some other parts, such as a gold swingarm (not sure if magnesium or not) and sprockets
  • Located Nottinghamshire, UK

MV-F4.com: http://www.f4oro.de/Parts/parts.html

  • Many exhaust options for F4 and Brutale
  • Very shiny carbon parts made for their shop for both F4 and Brutale (as well as some 'carbon look' parts)
  • Decals, stickers and pins
  • Covers, bags and even MV rugs
  • Specialty lights including the 'all-in-one' tail light, some very interesting turn signals (aluminum and silver anodized), bar end signal lights, mini turn signals for F4 and Brutale
  • Plate relocators
  • A Brutale air dam???
  • Custom (embroidered MV logos) seats for F4 and Brutale
  • Rear sets, Ohlins suspension, and the full MV Agusta offering from Rizoma
  • Many specialty items, like 'Fuel Friend' for an extra bit of petrol and fits in the tail section, a helmet lock, and many tools...
  • They must be contacted for many of their prices
  • Located in Germany

Rizoma: http://www.rizoma.com/index.html

  • Billet parts for MV Agusta
  • Not many of them are listed on the website in any category (except for a small section for the Brutale - 3 items)
  • Look under their Universal section for an idea of their available parts and contact them directly with fitment questions
  • Rearsets, Reservoirs, mirrors, Brutale License tag locator, etc
  • Their recommended retailer is CarpiMoto (see below)
  • Locations in Italy, France and Germany

Carpimoto: http://www.carpimoto.com/

  • Large online retailer of parts
  • Searchable by Make and Model
  • Way too many parts to list (65 pages just for the Brutale), but many are 'universal' bits like stickers, keychains and the like
  • Key retailer for Rizoma parts and accessories
  • Located in Genoa, Italy

Kaufmann Motos AG: http://www.hrkaufmann.ch/onlineshop/

  • Site is entirely in German
  • CRC Carbon bits
  • Magnesium and carbon wheels
  • License plate relocators
  • Turn signals of many types, including the Brutale 'passenger grab bar' area relocation set
  • Upgraded headlight for Brutale
  • F4 windscreens (5 types/colors), Brutale windscreens (two types)
  • Sliders (crash protectors) for all Agustas
  • Exhausts
  • Race bodywork, dash, windscreens
  • Nice billet top triple tree for F4
  • F4 slipper-clutch
  • MV Agusta CRC clothing and accessories, models, covers, stands and rugs
  • Located in Muhen, Switzerland

MV Agusta Parts (German, ships Intl): http://www.mvagusta-parts.com/e_startseite.html

  • Electronic speedometer recalibrator for all Agustas (recommended if changing sprockets)
  • All bodywork (unpainted) for racing or custom paint/replacement
  • Quickreleaseefastenerss
  • Crashpads (sliders) for all Agustas
  • Sprockets and chains (and quick-change carriers)
  • Forged aluminum and magnesium wheels; carbon wheels (Marchesini, PVM and BST)
  • Quality carbon fiber body parts (money- back guarantee!) for all Agustas
  • Brembo radial brake upgrade bits; all parts needed
  • All-in-one brake light and other signal lights
  • SIL (F4 and Brutale) and Arrow exhaust (Brutale)
  • Severalfastenerr options
  • Billet triple clamps (2 types)
  • Clip-ons
  • Rearsets (interesting design)
  • The famed German 860cc upgrade for Agusta 750 engines!
  • Slipper clutch for the 750 engine
  • Ohlins suspension
  • Every special tool and several stand choices
  • Large selection of stickers (not all listed on site)
  • Amazing selection of Agusta gear, such as jackets, model kits, key chains and even a tire valvle cover in the shape of a piston
  • Located in Mainburg, Germany

MV Agusta Benlux: http://www.racemotoren.nl/index_MV.html

  • Dutch source for MV Agusta Corse parts and kits
  • Also MV Agusta Corse apparel and gear

Shift-Tech: http://www.shift-tech.com/shop/enter.html

  • US seller for Lieb-Speed Carbon parts
  • Also on eBay as "kartwholesale", where some MV carbon parts are also auctioned\sold by them
  • Very high quality prepreg carbon and also sells MV fitment Gilles rearsets

Riding House: http://www.riding-house.com/parts/agusta.htm

  • Supplier of some nice rearsets
  • Also, they have the MV Corse Titanium exhausts, HID headlight kits, fork sliders, radiator covers for F4 and Brutale
  • They also have special, shop built bikes
  • Based in Osaka, Japan

eMoto/eBusters: http://www.emotouk.com/mvagusta.htm

  • Many parts here, including special carbon bits.
  • They also have MV Corse parts, bags, tank protectors, exhausts (Moto Corse, Arrow), performance parts such as air filters and Power Commanders, Gilles rearsets, frame sliders and protectors, windscreens and suede seats.
  • Excellent customer service!
  • Based in the UK

MV Agusta Deutschland GmbH: http://www.mvagusta.de/

  • Well designed site with news and updates in German
  • Mostly standard MV Agusta Corse parts
  • They sell many of the special parts in sets as well
  • Their special claim is the ultimate MV Agusta Tool Set; found under "MV Racing", "PRODUKTE" , "Special" - Great kit, but rather expensive
  • Based in Wesseling, Germany

DucatiShop: http://www.ducatishop.ch/

  • Look under MV Agusta on the left navigation pane
  • They have many parts from the MotoCorse Japan parts producer (see entry above) including the Brembo radial mount kit, Brutale rear seat cowl, some of their nice Ti bits, etc. They can also get most of their other parts not listed on their site
  • They also have the STM slipper clutch; Marchesini, Marvic, Dymag and BST wheels; various makes of many carbon parts - some hard-to-find; STM sprockets; chains; many Rizoma parts; various aftermarket turn indicators; rearsets from a few manufacturers - over 150 parts overall!
  • (Gunnar recommends!)
  • Located in Switzerland

Ilmberger Carbonparts: http://www.ilmberger-carbon.de/

  • Carbon parts for Brutale only currently; prices not listed
  • Quality appears superb
  • (Another Gunnar recommendation!)
  • Located in Germany

MCET: http://www.mcet.de/

  • More carbon parts for MV Agusta
  • Possibly other parts that would be useful for Agusta's, but the site is entirely in German
  • Located in Germany

Ducati Shed\Norton-SP: http://www.norton-sp.com/

  • Carbon parts for F4 and Brutale (many good photos) with good pricing
  • Dzus fasteners of all sorts
  • The necessary rear-wheel removal tool and a nice leather case to carry it in
  • The Kellermann halogen signals
  • And, the high-chrome silver wheel paint!
  • Based in Hamburg, Germany and starting to grow...

Motovation: http://www.motovationusa.com/mvstore/Scripts/prodList.asp?idCategory=64

  • Noteable for frame\fork\axle sliders for all MV Agusta models
  • License plate relocation kits
  • Arrow headers, mid-pipe and exhaust
  • Clutch and Brake Lever 'Skinz'
  • Nice Rearsets
  • Integrated rear signals and clear replacement lenses for stock signals
  • Based in Austin, Texas USA.

More to come...

There are, generally, two types of motorcycle owner, the tinkerer and the stocker. The stock people will buy a bike and leave it 'as is' throughout its existence; they may hold onto it forever or sell it when the next interesting machine is released on the world. We won't be dealing with them here. This is for those who like to change only some things or everything on their machine.

The tinkerers are always looking for the next best bit of hardware that will add that extra something to their bike. Some just buy one or two little add-ons to improve the look or performance of their machine and some go all out and just buy everything that they can get their hands on. This post is for the tinkerer; this will be a one-source for all currently known parts suppliers.

With MV Agusta there are limited resources, as we all know. Since this very exclusive make is most certainly a small company and produces only a few thousand motorcycles a year, not many suppliers make parts for them as they do for the big four in Japan, the American contingent, or our Italian cousins. So, this list is an attempt to bring together suggested suppliers, manufacturers and retailers that have been mentioned in many different posts in the various MV Agusta forums.

So, here will be website listings, mostly, with direct links to MV Agusta pages when possible. Also, some companies with only phone numbers may be listed. Comments are most welcome; experiences with quality of parts, ease of use, customer service and such will be very useful. As more information is made available about special and unique parts, they will be added to this list. Please contact Chris at quixotic_1@earthlink.net with any questions, concerns or additions

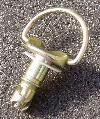
Dzus fastener damage to fairing paint? Read on:

Submitted by Jerry Finley


I'm anal.. so sue me.. Comes from being the #1 motorcycle detailer in the south for 5 years in a row. I have had my 03 MV F4 for just a few months now and I already notice just a bit of scarring of the paint where the Dzus fasteners rub against it. It may get worse.. it may not, but rather than just bend over and take it.... here's one solution that's cheap and effective.. While Home Depot and Lowes are retailer's of this stuff, they usually do NOT carry the Clear version. I simply ordered mine direct at 800.327.8583 EST Behold my humble How-To...


Parts/Materials Needed:
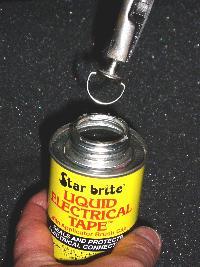
(1) Can Star Brite Liquid Electrical Tape from http://www.starbrite.com/ (about $6)

(1) pair pliers or vise grips
(1) block of styrofoam
(1) Imported beer


Step #1: Getting StartedI chose to do my fasteners a few at a time rather than remove all of them and the bodywork, but that was just a personal preference.First.. Remove whatever fasteners that you plan to coat from your bike. Make sure the ring of each fastener is clean.

Remember.. you are ONLY coating the end of the RING.. not the entire fastener. Duh. After you dip each Dzus in the liquid it will bead up and roll with the angle so you'll have to hang it upside down so the bead hangs perfectly down. This will guarantee that the majority of the hardened liquid is at the point where the fastener comes into contact with the bikes paint surface..
The consistency of the StarBrite liquid is, for the lack of a better analogy, thick as molasses. You don't want to get any more on the ring than is necessary. As the liquid does NOT come to the top of the can, you'll need to hold the fastener with a pair of pliers or vise grips. Do NOT leave the fastener in the "juice" for more than a second or two as you want as little on the ring as possible.


Step #2: Hang 'Em HighOnce you've dipped your Dzus (hmmm... sounds sexy....makes my nipples hard.. but I digress...) you'll need to hang them upside down for a full 24hrs as is recommended in the packaging. I chose a block of Styrofoam which worked like a charm.


Step #3: Reinstall...Hopefully, you did wait the required 24 hrs.. If you've done it correctly, you can't even see the coating on each ring. A few will have a slight accumulation, but hardly noticeable.

Reinstall, sit back and revel in your own magnificence. Your bike's paint will now stay as God/Yewah, Crom intended... You're done.. Beer/Bong time..


Visit Jerry's site including additional how-to's and parts for sale at: http://piratesk12site.net/MVIntro.htm


-edited JamesC

Spark Plug Fitments

Beyond the normal replacement of spark plugs it has come to light that there is occasional stalling, especially on 1000cc models, which can be remedied by the use of certain spark plugs. Please also note that your throttle body sync and base CO% should also be carefully checked as this can be root cause of stalling on it's own.

Spark Plugs to use:

NGK CR9EIX - iridium, confirmed fix for stalling
NGK CR9EB - normal replacement model for brutale per manual - confirmed fix for stalling
NGK CR9E - normal replacement model for 750cc per manual
Champion G59c - normal prescribed replacement model for 750cc per manual

Spark Plugs fitted to bike as OEM:

NGK CR9EB for 750S
CHAMPION G 54 V for SPR/SR/Senna
NGK CR9EKB for Senna
NGK R 0045 - J 10 for Senna

NGK CR9EKB - listed as standard on F4 1000/Ago, has been present when stalling, recommend CR9EIX or CR9EB instead

Additional notes about Denso plugs:
Although we were advised by engine designer Andrea Goggi NOT to use denso type plugs, they seem to be popular with the Italian forum members. We were advised Denso type plugs were of an incorrect shape and thus not compatible with the MV heads. If you are interested, the model the Italian forum members are using is: Denso IU27 iridium.


Additional notes:

-Ensure use of anti-seize on spark plug threads
-Torque for fitting spark plugs is 12Nm


Your spark plugs may not come with the small terminal ends which screw onto the end of the plug and insert into the plug wires. These are called "Terminal Nuts" and can be troublesome to find.

Local automotive or motorcycle shops can likely help you, or online at:

http://www.davesmotors.com/store/product997.html


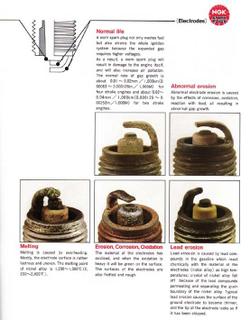
For troubleshooting spark plug appearance:

http://www.ngksparkplugs.com/techinfo/spark_plugs/techtips.asp?nav=31000&country=US

click to enlarge


-JamesC

Monday, September 12, 2005

Fuel Line Fittings

More than a few MV owners have had their plastic fuel line fittings crack and or break off entirely causing fuel leakage. There are two primary sources for metal (chrome plated brass) replacement fittings. Please note materials and writeup at bottom of page if you have an F4 1000 or Brutale 910 derivative.

OMEGA ENGINEERING, INC.

http://www.omega.com/pdf/tubing/couplings/ft-lcseries/ft-lcseries.asp

updated page: http://www.omega.com/pptst/ftlc.html -courtesy John/falcopilot


P/N FT-LCD100-04-VITON - Coupling Body or threaded part that fits into tank
P/N FT-LCD230-06-VITON - Hose Barb or part that fits on hose

(photos courtesy of hb)


Colder Products Corp. available through Ryan Herco

http://webcat.ryanherco.com/products/040/110/140/040110140.cfm

P/N LCD10004 - Coupling Body or threaded part that fits into tank
P/N LCD23006 - Hose Barb or part that fits on hose

The main culprit is "usually" the Hose Barb which is the 90 degree elbow fitting but some owners have had the Coupling Body fail. The metal elbow replacement will work fine with the stock plastic fitting in the tank if you choose to go that route. If you choose to also replace the Coupling Body be sure to wrap the threads with some teflon tape prior to installation.

Note: When ordering you may want to purchase some extras to have as back-ups.


It is advised that you regularly replace the viton O-rings and also add a small amount of silicone grease to them before re-assembly.

http://www.mcmaster.com/ is a good source for replacement O-rings, amongst other things. You can purchase a package of 100 for US$5-8.

Male side Viton (Fluorocarbon) O-Ring (black) AS568A Dash # 011, 7/16 inch O.D. by 5/16 inch I.D. by 1/16 inch wide - McMaster-Carr Part # 9464K16, $7.54 per 100 pack (courtesy of the Ducati forum). This is the side to grease at every removal.

Female side (in tank dry break) Viton (Fluorocarbon) O-Ring (black) 9464K13 at 5/16 OD by 3/16 ID

Also, pay attention when putting your tank back on as to how you position the fuel lines. They should be positioned left to right, not front to back, or they could get pinched between the tank and frame cross member.

Note: A Triumph dealer is another alternative if you’re in a bind but I understand that they only offer ¼” fittings so you’ll also have to replace the fuel lines as well to make them work.

MV Factory manual also suggests the use of Loctite 577 on the thread interface between fuel pump housing and quick connect fitting.

=================Note post 2005 info below regarding fuel line============
===========================Thanks to Altoon/AP===================
Performing the fuel fitting swap (metal for plastic) on the F4 1000cc and Brutale 910 motors is not as straight-forward as it used to be on the 750s. The challenge stems from the use of a new fuel line. It is interesting to note that this new fuel line does not use any clamps at the fittings!

The line is constructed from two parts; a firm, stiff inner core, and a softer, pliable outer cover (see the photo for reference). The inner core material appears to be made from a PVC tube with a fluor-polymer coating. The outer tubing is made from Sunprene, a PVC based thermoplastic elastomer that is often used as a replacement for rubber. The supplier for the fuel hose is Dayco. Unfortunately, I have not been able to determine a part number for the hose.


The problem is that the inner core is very stiff, and it will not slide over the barbed end of the male fuel fitting. As can be seen in the photo, the I.D. of the tube is smaller than the O.D. of the fitting. Getting the hose on the fitting is very extremely difficult, but it can be done. My approach was to cut the old plastic fitting off at the hose junction. Then using a hammer, I hit the hose to break the remaining barbed end into pieces, which were pulled out with a set of small needle-nose pliers. Next, the new fitting was forced into the hose. And I do mean forced. You need to act quickly as the inner tube will actually shrink, making the fitment almost impossible. It helps to lubricate the fitting barbs and inner hose with silicone spray.

At this time, attempts are being made to find alternatives to the fuel line. However, there have been some problems in sourcing all the necessary components.

The fuel fittings on the fuel rail end are made by John Guest (http://www.johnguest.com/). In order to make a replacement fuel hose system, these fitting will be required. However, obtaining the fittings has been extremely difficult.

This photo shows the fitting as it sits on the fuel rail, with the gas tank installed. You can see this fitting if you remove the either of the two silver side-plates that cover the tank mounting hardware.


This is a close-up photo of the fitting itself. The end inside the hose is barbed. To release the fitting from the rail, you press on the two tabs on either side then slide it off. One tab is indicated by the red arrow.


Here is a photo of the fuel rail after the fitting has been removed. Note the ring on the tube (red arrow). This is the latch collar that the John Guest fitting snaps onto. When you press the tabs on the sides of the fitting, you will release it from this latch collar.


TGM, TS, BC, FP, JC, AP, HB

Valentine 1 radar detector installation

Provided by Jerry Finley
http://piratesk12site.net/MVV1.htm

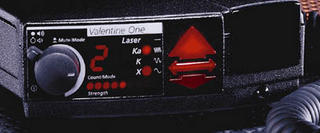
How anyone can ride a high performance motorcycle without a radar detector is beyond my comprehension...I can't ride 10 minutes without getting nailed with a "velocity award.".. Never fails. First thing I do when I purchase any motorcycle is figure in the cost of either the Passport 8500 or the Valentine One.. Depending on who you talk to, either is arguably the best money can buy. I run the Passport 8500 on my K12RS, but it simply didn't fit right on the MV so I paid the bucks and bought a new V1 for this install. FYI.. I have installed over 100 detectors over the years and 100% of them involved in-helmet speakers which involves lots of clever wiring. On the MV I took a different route.. With the exception of the power wire and ground for the V1... I went wireless using the H.A.R.D which is ...Inside Helmet Visual Alert - Instead of a blaring speaker, H.A.R.D. provides an immediate visual alert: a flashing LED light , inside the helmet that is illuminated within your field of vision allowing immediate recognition of radar. The H.A.R.D. consists of two miniature devices. A transmitter that broadcasts to a receiver within the helmet. Here is a step-by step of what I've done on my MV....


Parts/Materials Needed:
(1) Valentine One Radar Detector from http://www.valentineone.com/ (US $399)
(1) H.A.R.D. from http://www.legalspeeding.com/ (About US $160)
(1) Some hex wrenches / vise grips
(1) various wire splicing tools/crimpers/wire tires/electric tape
(1) heavy duty Velcro
(1) J B Weld or sodering gun
(1) 1 Six pack (Imported beer)


Wiring: Hot WireThis is a relatively easy install once you find out a good hot wire and ground... so you can benefit from my torment. FYI..both the furnished manual and the $100 shop manual are useless as tit's on a boar for determining wire color codes on this bike.. It's as if it was written by Stevie Wonder and edited by Ray Charles. I had to take my F4 to a local legend and BMW Jedi Knight to let him peruse the wiring. He deciphered the Matrix code and showed me a good place to run the hot wire and suggested a couple of places for a ground. As per the prophecy.. his advice was dead on...

1. Loosen (but do not remove) the (2) screws securing the left side rear view mirror post then remove the (4) screws securing the left side plate to expose wiring harness (see pic at right).
2. After the 4 screws have been removed do NOT try to yank the plate off as one small wiring harness is attached underneath. This plate does NOT come out easily. It must be coaxed a little. Unplug the single wire harness fastened to the underside and set plate aside.
3. Unplug the large wire harness. You may have to slice the plastic coating back a little to access the wire. The hot wire I used on my 2003 is the Red wire with Green stripe. This is a switched wire meaning that when your key is off.. the power is off. I did a dry run to see how much actual V1 wire I needed then using one of the finished wire clips, I spliced directly into this hot wire.

Wiring: Ground
The hot wire was the easy part.. the ground proved to be a pain in the ass. There's really nothing easily accessible. You may have better luck. I chose to run the ground wire off the V1 to the metal clip that secures the headlight housing as shown in this pic...


1. I removed the clip and using J B Weld (a mixable liquid weld) secured the ground wire directly to the clip.
2. I waited about 4 hours for the J B to dry then reinstalled.
3. As to make sure the area of contact remains in top shape I placed a dab of liquid rubber electrical sealant over the entire area. It forms a waterproof barrier as well as secures the wire even better. This stuff can be purchased at Home Depot or Lowes for about $5 and is simply a liquid equivalent of electrical tape or shrink tubing. It dries in 5 minutes. Comes in 4 or 5 colors.

Hiding Wires: / V1 Install
The word here is anal....Routing the wires in a "clean" fashion has it's own rewards so take your time.. Try to have your new extra wiring as tucked in as possible before you replace the metal side plate. It's a tight fit any way you look at it and with all your new wire under there.. it's even tougher...


1. Replace the plate and (4) screws. Make sure the metal fairing post that holds the rear view mirror is positioned properly over the plate before tightening the (2) upper screws. If this post is NOT positioned properly with the two tits slotting into the 2 holes in the plate, your left front blinker will NOT work. The only thing you should have sticking out when done is the telephone type wire that powers the V1 and the ground wire.You should have about 8-10" length for both.
2. OK..Where to install the V1? A dilemma.. or is it? Here's my solution. Pay attention. The V1 comes with a sunviser clip. What I did was bend the very end of this clip flat using some vise grips. The sunviser clip now has a flat edge.
3. Take a little sand paper and smooth out the textured surface of the viser clip. Clean it off well.
4. The inside of the fairing on the left side has a perfect spot to secure this visor clip. (see pic at right) In the pic shown I used some white Velcro for test and positioning purposes. Make sure when positioning you check your lock-to-lock to make sure your bars clear the V1. Mine had about 1/2" clearance when done. I have since added some black industrial strength Velcro and it's holding solid as a rock. The best part is, I can simply slide the V1 out of the clip and unplug in a matter of seconds and it looks like it belongs here.


H.A.R.D. Install:
The HARD unit is a simple two piece system. The lower end consists of a tiny 3/4"x1" box with a phone type wire coming out of it. The upper is a small box with a flexible wire (with RED LED on the end) and an on/off switch. The way it works is this...


1. Plug the V1 phone type power wire (that is sticking out from underneath your metal side plate) into the side of the HARD.
2. Plug the HARD into the side of the V1... I stuck the little HARD transmitter inside the opening of the V1 visor clip. Perfect!
3. Place the receiver either inside your helmet under some padding.. neck-roll or ear opening (or stick on the outside of your helmet for easy access.) Keep in mind.. the HARD receiver is NOT waterproof.
4. Run the flexible wire with the RED LED light to where you can see it with your peripheral vision. A little trial and error is necessary to find the proper spot. I chose the Janet Jackson method of coming up from the bottom like a microphone. That's it.

Notes of Importance: Yes.. Ideally the V1 should be exposed for best reception of evil radar/laser waves. I chose a cleaner.. hidden-from-view method of install just so I wouldn't fuck up the visual beauty of the bike. A trade off, perhaps but, IMHO.. clean is good. BTW. Reception seems to be almost as good as if it weren't shooting through fiberglass.. Surprisingly, the V1's face is clearly in view and a quick glance offers easy view of the arrows showing were the "bad guys" are... Cool!
Also: There is a downside of the H.A.R.D. The receiving unit (on your helmet) must be switched on when in use.. and OFF when you get off the bike. Other people I spoke to confessed they regularly forgot to turn the unit off after their ride which means over night the two furnished watch-type batteries will go dead.. Sure enough.. after my first test ride.. I forgot. Next day.. TWO dead batteries. With my pathetic memory I think I'll be buying a dozen at a time... Another job well done, me thinks...Next time you ride.. you're on a quasi-level playing field with the blue meanies.... For now...Ride fast.. brake hard.....


Visit Jerry's site including additional how-to's and parts for sale at:

http://piratesk12site.net/MVIntro.htm

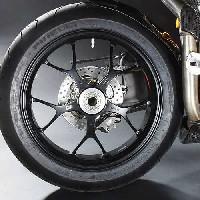
Wheel fitments and weights for OEM and aftermarket

Following is a list of wheels, their weights and MOI - which fit MV Agusta Brutale and F4 with two popular industry alternatives listed for comparison [which do not].

For the MOI, "Moment of inertia"basically lower is better on a comparative level, has to do with the force to spin up at a certain rotational acceleration and the gyroscopic characteristics. How the wheel "deals" with it's weight.

Data listed in Front/Rear format.

SportRider Magazine Feb 04:

-BST street: Front 5.5lb / Rear 10.4lb MOI: 217 lb in2 / 304lb in2

photo courtesy BST

-Carrozzeria forged alu: F 9.4 / R 14.02 MOI: 421 / 587 (no known MV fit)

-Dymag Carbon: F 7.3 / R 12.38 MOI: 301 / 406

photo courtesy dymag.com

-Marchesini forged alu: F 8.82 / R 13.8 MOI: 362 / 496 *Rear=9.98lb SS swingarm
-Marchesini forged mg: F 6.54 / R 11.12 MOI: 276 / 373 *Rear=7.76lb SS swingarm

-Marchesini Shining forged Alu "Kompe": F 8.23lb / R 10.42 3.73kg / 4.72kg
photo courtesy TAWvehicle.com


Brembo Superlight Forged Aluminum: F 6.47 / R 7.17 MOI: unknown
Kg. 2.938 (Forged Alu Front) Kg. 3.253 (Forged Alu Rear)


photos courtesy Gunnar

-Marvic Penta cast mg: F 7.46 / R 12.16 MOI: 327 / 437

photos courtesy pro6cycle.com

-OZ HL02 (Aprilia RSVR Factory) F 8.4 / R 15.54 MOI 331 / 565 (no known MV fit)

-PVM forged al Y5: F 7.96 / R 13.44 MOI: 346 / 489
-PVM forged mg Y5: F 5.6 / R 9.76 MOI: 209 / 290

photos courtesy ema-usa.com


Manufacturer supplied data, new wheel was not yet released as of above test:
Found on www.ema-usa.com
PVM forged alu Y10: F 8 / R 12.5 MOI: ? but 20% lower than Y5 alu
PVM forged mg Y10: F 5 / R 8 MOI: ? but 20% lower than their Y5 mg

photo courtesy ema-usa

photo courtesy www.motocorse.jp


-MV Agusta OEM Aluminum rims combined: 11.6kg / 25.55lbs

-MV Agusta OEM ORO Magnesium rims combined: 7.1kg/ 15.7lbs
3.2 front and 3.9 rear

- Marchesini 10 spoke magnesium rims combined: 6.49kg / 14.3lb ss swingarm
- Marchesini 10 spoke aluminum rims combined: 8.5kg / 18.8lb ss swingarm
*incl spacers and bearings per motowheels.com

-BST Carbon Fiber rims combined: 7.2kg / 16.6lbs per motowheels.com for ss swingarm
*incl bearings, valvestems and spacers

-PVM magnesium rims combined: 6.8kg


=====================================
From TAW, source of Brembo parts and Marchesini wheels:
http://www.tawvehicle.com/alloyperf.htm

Alloy Process UTS: Ultimate Tensile Strength
Al-356-2 Aluminum Cast 228 mpa/33 KSI
AZ-91D Magnesium Cast 230 / 34
AL-6061-T6 Aluminum Forged 310 / 45
MA-14 Magnesium Forged 328 / 48
This is an area where the forged process gives you higher strength and performance. The higher the number the stronger the wheel. This means that the forged aluminum wheel is 36% stronger than the cast aluminum wheel. The forged magnesium wheel is 42% stronger than the cast magnesium wheel.

Alloy Process YTS: Yield Tensile Strength
Al-356-2 Aluminum Cast 166 MPA / 24.1 KSI
AZ-91D Magnesium Cast 160 / 23
AL-6061-T6 Aluminum Forged 276 / 40
MA-14 Magnesium Forged 287 / 42

Again, this shows the yield tensile strength of the product. You can see that the forged aluminum is 66% stronger than the cast aluminum.The forged magnesium is 79% stronger than the cast magnesium.

Alloy Process Elongation
Al-356-2 Aluminum Cast 3.5%
AZ-91D Magnesium Cast 3.0%
AL-6061-T6 Aluminum Forged 12.0%
MA-14 Magnesium Forged 10.0%
This shows how brittle the material is. The higher the percentage number the stronger the material is. The lower percentage shows that the material is more brittle and is more likely to fail under an impact.
=======================================


JamesC

Thursday, September 08, 2005

Rear Brake reservoir relocation & resolving poor performance

Although the usefulness of the rear brake is debated time and again this article only hopes to explain a few ways to improve its performance should you so choose.

There are several possibilities for improvement, from fairly simple to fairly involved. We will start with the simple methods and move to the more involved, some owners stop at the simplest method while others move to the most complicated - your results may vary depending on how you use the rear brake.

Section #1 - easy bleeding of rear brake
Section #2 - adds the complete bleeding process to above
Section #3 - relocation of rear brake reservoir

First, high quality brake fluid should be used in all of the below scenarios. You are interested in the specification level of fluid, the dry boiling point and the wet boiling point.

Here is a very good write-up by a well respected automotive engineering expert, Carrol Shelby, on brake fluid properties:

http://www.stoptech.com/tech_info/wp_brakefluid_1a.shtml


The two most popular fluids are Motul RBF 600 and Castrol SRF. Motul is much easier to find and about 25% the cost of Castrol SRF yet is not quite at the level of SRF, as the article explained in detail. Most automotive and motorcycle shops carry in stock or have access to Motul RBF600. Specialty race shops, most likely automotive, will need to be contacted for Castrol SRF purchase.

Motul RBF600 data sheet:
http://www.motul.com/motulbaseuk/gab_fiche2b.asp


Castrol SRF data sheet:
http://www.castrol.com/liveassets/bp_internet/castrol/castrol_usa/STAGING/local_assets/downloads/c/ccc.pdf


The simplest method of resolution is to simply bleed your rear brake. There is an easy way and a more complete way to do this:

*Note, brake fluid is extremely damaging to finishes. Protect all surfaces from fluid!

Parts needed:
Brake fluid
Clear hose (like that for aquarium which fits over rear caliper nipple. ~6mm or 1/4")
Container for old brake fluid drain

#1 Easiest
-Remove lower V fairing
-Remove right side fairing
-*Remove rear wheel *note reverse threaded 55mm wheel nut at 220-240Nm
-Remove rear brake reservoir from behind right side frame plate *(2) 8mm bolts and note hose routing for reassembly
-Relocate reservoir to engine side cover for easy access, tie to footpeg or dzus plate keeping level -Remove black Rear Caliper nipple cover and attach clear hose which drains into container
-Carefully remove reservoir top with two cross-head/philips screws
-Carefully remove rubber diaphragm from inside reservoir. Note the shape of the diaphragm for reassembly, it is shaped to take up space in the reservoir
-Remove almost all old fluid before adding new. Leave barely just enough at the bottom so no air is sucked into the system before adding new fluid
-Fill fluid to 1/4 - 1/2 of the reservoir
-Pump rear brake pedal 3+ times to build up pressure in system, hold pedal down at last stroke to keep pressure in system
-Using combination wrench (8mm) slightly open the rear caliper bleed nipple allowing fluid to escape into discard container while continuing to apply pressure to brake pedal. Close bleed nipple as soon as fluid stops moving and then you can release brake pedal
-Pump rear brake pedal 3+ times and continue the two steps above, alternating building up pressure and releasing the old fluid into the discard container

Reassembly:
-Tighten fully then remove combination wrench from rear caliper bleed nipple
-Remove fluid hose and replace bleed nipple cover
-Clean off rubber reservoir diaphragm and reshape
-Add or remove fluid so that there is approx 1/4-1/3 fluid filling the reservoir
-Insert diaphragm paying careful attention to brake fluid level, you want the fluid to reach the fill line of the reservoir when diaphragm is completely inserted
-Screw cover closed on reservoir
*suggest pumping brake pedal testing caliper bleed nipple and reservoir cover for leaks
-Rebolt reservoir behind right side frame plate paying close attention to hose routing
-Reattach rear wheel noting reverse threaded 55mm wheel nut, torque to 220-240Nm


*Note, pay close attention to the reservoir during this work never allowing it to empty! If it sucks air into the system you will have to work to remove all air from hoses/caliper all over again! Much like a bathtub drain the vacuum can suck air into the system even when there is a small amount of fluid at the bottom - beware.

Once all air is removed and you are sure it is only new fluid in the system you are done with this easiest method, suggest you at least read over next hardest method, complete bleeding, for further understanding should this process alone not entirely fix the rear brake.


#2 Complete Bleeding
-Remove lower V fairing
-Remove right side fairing
-Remove rear wheel *note reverse threaded wheel nut at 220-240Nm
-Remove rear brake reservoir from behind right side frame plate *(2) 8mm bolts
-Relocate reservoir to engine side cover for easy access, tie to footpeg or dzus plate keeping level
-Remove black Rear Caliper nipple cover and attach clear hose which drains into container -Carefully remove reservoir top with two cross-head/philips screws
-Carefully remove rubber diaphragm from inside reservoir. Note the shape of the diaphragm for reassembly, it is shaped to take up space in the reservoir
-Remove almost all old fluid before adding new. Leave barely just enough at the bottom so no air is sucked into the system before adding new fluid
-Fill fluid to 1/4 - 1/2 of the reservoir
-Remove the rear brake pads
* Optional - Free rear caliper brake line from swingarm to allow a bit of slack
-Remove the two bolts attaching caliper to swingarm mount
-Position the rear brake caliper so that the bleed nipple is the highest point on the assembly, this allows any air bubbles to rise to the top during the bleeding process
*Optional - reinstall rear brake pads to act as spacers and thus keep caliper pistons from hyperextending during bleeding process
-Pump rear brake pedal 3+ times to build up pressure in system, hold pedal down at last stroke to keep pressure in system
-Using combination wrench *8mm slightly open the rear caliper bleed nipple allowing fluid to escape into discard container while continuing to apply pressure to brake pedal. Close bleed nipple as soon as fluid stops moving and then you can release brake pedal
-Pump rear brake pedal 3+ times and continue the two steps above, alternating building up pressure and releasing the old fluid into the discard container
*Optional step, once you are sure all old fluid has been evacuated you can then run your bleed nipple extraction hose back into the reservoir. This cycles the new fluid through the caliper and hoses thus extracting the air bubles but without wasting good new fluid

#3 Relocation of Rear Brake Reservoir

Parts needed:
Length of brake hose, 1m / 3ft (? Inner Diameter)
Small piece of alu or metal to serve as a bracket
*Optional, two new hose clamps fro brake hose

Starting in 2003, F4 750 models were fitted with a relocated rear brake reservoir to help keep it away from residual exhaust heat. Some owners have made a modification to mimic this. The Brutale and 1000cc models also had their reservoir relocated to reside behind the right side frame plate and under the gas/petrol tank.

-Remove lower v-cowl fairing
-Remove right side fairing
-Remove rear wheel, 55mm reverse threaded 220-240Nm
-Remove (2) 8mm bolts to free the rear brake reservoir from behind the right side frame plate
-Remove (2) cross-head/philips screws on reservoir cap and empty fluid
-Remove hose from bottom of reservoir
-Remove hose from rear brake master cylinder
-Remove upper exhaust mount bolt

Approximate the size needed for a small custom bracket, this will affix the rear brake reservoir to the upper exhaust mount as follows

Photo courtesy John King

It is likely you will have enough bolt length on the original bolt but if you choose a large width bracket you may need to extend your exhaust mount bolt by the corresponding amount. A simple bolt, nut and lock washer will affix the reservoir to the new bracket.


-Route your new brake line, without yet affixing to reservoir or master cylinder, from the general location of each, down subframe, behind frame plate and around to the master cylinder

Photo courtesy John King


Photo courtesy John King


Photo courtesy John King


Photo courtesy John King


Some owners have also protected their brake line with heat resistant shielding such as that manufactured by thermotec:

http://www.thermotec.com/products/full/14005/14005.html


These sleeves will need to be added before you affix your new brake line to either side.

-Affix new line to each side of the system, reservoir and rear brake master cylinder - double check hose clamps on both ends
-Proceed to bleed the rear brake system as seen in section #1 or #2 above
-Reinstall rear wheel with 55mm reverse threaded wheel nut at 22-240Nm


Please note there are alternate methods of bleeding a brake system such as that offered by Mighty Vac and others. On motorcycles I happen to prefer to use the master cylinder itself to bleed as the reservoirs on motorcycles are so small it is easy to overcome the new fluid supply and accidentally suck air into the system. There are some advantages to these systems however, in that their pressure may overcome bubbles in the system which can remain embedded by simple master cylinder pressure. Most users prefer to stay below 12psi / .83 bar so as not to damage seals in the system.
The use of these systems is fairly universal, you attach the extraction tube to the caliper bleed nipple, either pump up pressure or turn on compressor, and then release the valve which sucks the old fluid into the system's extraction container.

If you are interested in these systems see below:

Mighty Vac can be found at most automotive repair supply shops. It is the hand pump type and has only a small extraction reservoir:


Another vendor who offers a few types of bleed systems is Griots Garage in the USA
www.griotsgarage.com

The following unit is a hand pump type and has a very large extraction reservoir (can also be used to extract oil from the sump, for example):


The following unit is a compressor type whereby you connect the unit to the air hose and only have to use the release valve trigger to begin extraction, it has a middle sized extraction reservoir:


-JamesC

Wednesday, September 07, 2005

Oils suggested by the factory

There are two officially supported and suggested motor oils per the Research and Development Lab at the factory.

The first, and specified per the manual, is Agip:

Agip 4T 10W - 60

This can be ordered directly from American Agip for USA owners:
http://www.americanagip.com/


The next oil is somewhat easier to find and is available and most motorcycle retailers or online


Motul 300V 15W-50

This is from the MV Yahoogroups and originates with the engine deisgner:

"Another bit of informations: change oil every 6000 Kms (3,728mi). Seems banal, but any
kind of problem related to wear can be influenced by oil change.

We use AGIP Racing 4T 10W-60 and it it really works well (it's not only a
commercial issue).
We also have direct experience with Motul V 300 15W-50, which is also a very good
oil. "


-JamesC